Monday, April 18, 2011

Staircase inspiration

Work continues.  No great pics to throw up today so instead I'm going to post about inspiring staircases.

I love this bindweed patterned wallpaper on the risers:
Source:  Ferm Living

These are my favorites however:
Source: Sugar City Journal

I really want to find a wallpaper or stencil to mimic this.  I love the blue and white, the classic damask pattern, and the slightly unexpected surprise of it.  I am thinking wallpaper would be best to hide all the dings and dents in the risers.  It's also easiest to undo (if the risers are primed properly).  

Then I want to add dust corners.  Are you familiar with these little bits of Victoriana?  They are small metal triangles that nail into the corners to keep the dust out and look like this:


Installed they look like this:
Source: 5monsters

What do you think?  Opinions?  

Saturday, April 16, 2011

Spring Break, Day I

We started early this morning by running to the grocery store, after a long hiatus.  I've gotten to the point that I really hate going.  I am not a fan of the new Martin's.  Kroger is undergoing construction makes it a pain to get in and out of.  So, I've been avoiding it.  Running out of toothpaste and toilet paper made it a necessity this morning.  Then we braved the rain and made it to the South-er the James farmer's market to pick up dog food. Then it was off to City Garden for their plant sale.  Picked up several types of basil, some Greek oregano, borage (for Pimm's Cup), and a couple of different peppers.  Hopefully those will get put in this week.

After that, we came home and each went to work.  P tackled her backdoor/fridge hole area and I went down to the basement to clean up the mess I made last week when looking for round nose pliers to string crystals on those sconces I showed you last week.  That project is still in progress and hopefully I'll have pics and a post on that later on this week.  In any case, the search for the pliers illustrated the mess that was the boxes of art crap I had piled up down there.  So over the past week or so, I've been trying to unpack, organize, clean out and tidy up.  Finished that this afternoon.  Unfortunately, it's not very picture worthy.  Suffice it to say, I can now find all my stuff and have cleared off both work tables down there.

P's project does have some photo evidence.  Here's one of the earliest before pics:

This was from our earliest walkthroughs.  The doorway on the right led into the sunroom.  The one on the left is the backdoor to the back yard.  Dig the plastic pearly brown tiles, floral curtain, and yellow/brown plaid wallpaper.  YUCK!

A middling pic before we moved in. I'd primed the plastic tiles:

Once we had stripped and repainted the back door:

Last week, P got excited and did this:
And pretty soon it looked like this:
And tonight it looks like this:
The box is the old built in ice box.  Sometime in the distant past, they removed the doors and drywalled over the hole.  We knew it was still there behind the drywall because the box is still outside on the back porch.  So, P went ahead and opened it up.  We need to wire an outlet there and then slide in a beverage fridge.  Thereby honoring the original architecture, but with a modern twist.  If we still had the original doors, we would have restored it, but they were long gone.  

I'm going to try and post at least once a day this week with updates on our progress, so keep checking back.

Wednesday, April 13, 2011

Spring Break To-Do List


  1. Finish stripping banister, sand spindles, caulk everything, prime and paint risers, baseboards, and spindles, stain banister and decide top coat (wax?).
  2. Insulate old door to patio from new bathroom and install bead board in old screen door. (pics to come). 
  3. Caulk joints on the balusters on terrace and paint. 
  4. Address giant hole in the wall in the kitchen. 
  5. Pick up paint deck from Ben Moore and start deciding colors for guest room, foyer, vestibule, and master bedroom. 
  6. Measure powder room for wall paper. 
  7. Price out planned shelving unit for sunroom (inspiration here). 
  8. Kill weeds and remove debris from hillside in front. Plant hill with herbs and strawberries. 
  9. Drink lots of cold beer. 

Wednesday, April 6, 2011

More Miscellany

The long slog on the banister continues.  It's not fun and exciting and it's even more boring to photograph.  So, no pics of the staircase right now.  I will confess, I only work on it sometimes.  I'm not there scrubbing and stripping and sanding every weekend.  I have to gird my loins, wrists, and fingers and force myself to work on it every few weeks.  BUT, that will change when spring break rolls around.  I am planning to dedicate my week to finishing up the staircase.  I want that puppy stripped, cleaned, sanded, stained, caulked, and painted by week's end.

But, I have been out thrifting and doing some other fun projects.  I suck at taking pictures and the iPhone isn't any better at it, but I'm not a professional getting paid the big bucks...so, we have crappy pictures.

I found two of these candle sconces at Goodwill for $3.  Primed and painted, they will look great somewhere.  The bobeches have holes in them so I'm going to need to find some crystals.  Black ones perhaps?


I helped my neighbors with some planting issues they were having and in return they gifted me a vintage globe that they had a double of.  I've been wanting one for a while and took it with glee!  And painted that sucker with some chalkboard paint.  Now look at it!

I have also been picking up lots of frames.  I have a project in the works that I'll show you later once it's finished.  But since I had the chalk board paint out...(dangerous words)

I've already confessed to you my thing for chairs.  I have an equally rabid thing for lamps.  I love them.  I love to pick up a cool lamp at a thrift store and rewire and paint it and make it totally cool and unique.  Cool lamps are also prohibitively expensive.  I bought this brass lamp at the thrift store because of it's cool shape.  I rewired it and picked up a shade (it's a bit too big for it) and painted it with some spray paint I had on hand.  I like it!  I have a few more to show you but I haven't taken any pics of those yet.

And I've been framing and hanging art around.  Yes, I'm ignoring the fact that most of the walls haven't yet been painted, only primed.  I was sick of looking at blank walls:


I'm hoping to pick up a CraigsList couch soon so that I finally have some where to sit in my living room other than my half a dozen mismatched chairs.    

I really should start an etsy store to sell some of this stuff cause I don't have enough room for it all.

AND, I finally hung up this awesome, wonderful quilt a dear friend of mine made for me.  I just love it!

Saturday, March 5, 2011

Miscellanea Round Up

Work on the staircase continues apace, a very slow pace, but apace nonetheless.  I'm still scrubbing off the dried up stripper.  I've picked up some ebony stain and hope that staining time comes soon.

So, in light of the slow progress, I thought I'd show some of the projects we worked on over the summer and fall.

Summer was mostly dedicated to organizing the basement.  This is what it looked like when we moved in:
And that's pretty much how it stayed for a long while.  Yes, I have a pair of mannequin legs in my basement, don't you? We moved all of my art space stuff to a back room in the basement and piled up tons of holiday stuff up against a wall, but found it was getting in the way. 
So, we built a shelf under the basement stairs to store the holiday stuff:

Then I built two work benches:


And I built some lumber/mill work storage as well:


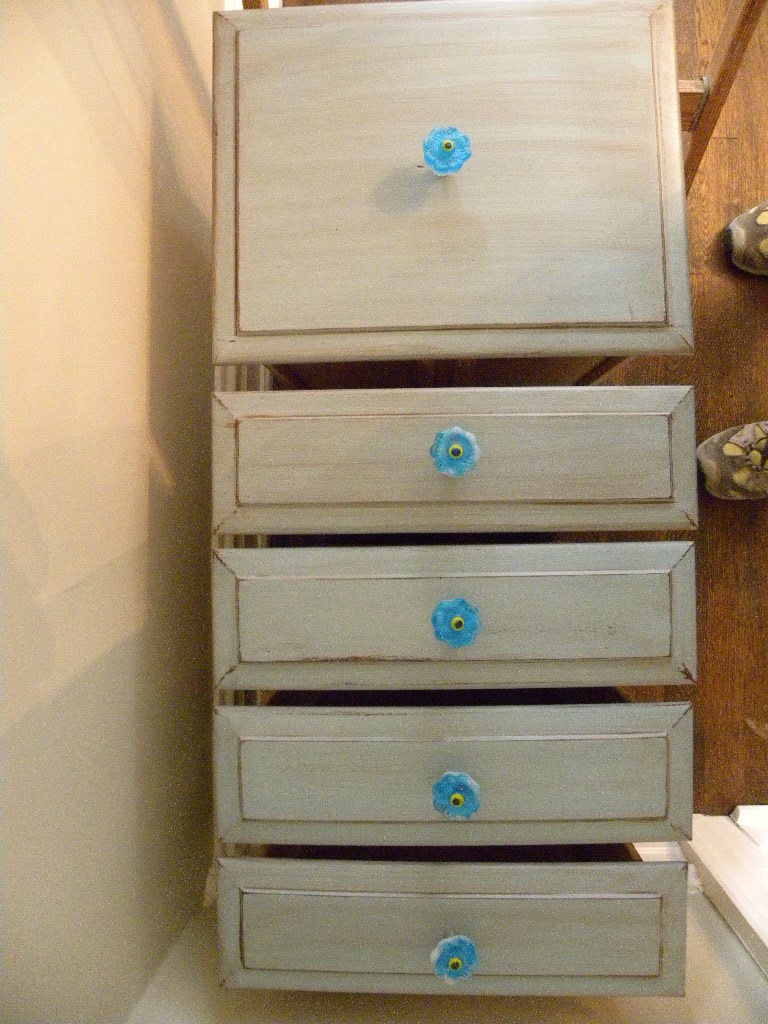
This game me the space to work on the cabinet.  We got this cabinet from the rehab next door.  Can you believe they were going to just throw it out?  I spent several days stripping it, cleaning it, then repainting it.  I did the same with the wooden sets of drawers that used to be the base of the desk at the old house.  The pulls are glass that I made in classes I took at the Visual Arts Center.

Okay, so the after is a pretty crappy iphone pic, but you can see where the cabinet ended up.  I still need to buy a marble desktop, but haven't gotten around to that yet.


The wonderful boys across the street donated an unpainted version of the skylight.  I stripped and reglazed it and had the old painted one replaced (who paints a sky light?).  Now we get light in there during the day.


We also painted the front door and shutters a lovely blue.  It's more of a French blue than an Aegean blue, but I still like it.  It's kinda quirky.  We also took out the filigree from the storm door, which streamlined and cleaned it up a bit. 


 And I finally got to install my hand of Fatima door knocker that I picked up in Greece a few years ago. 

We also stripped and painted the back door the same color.

Where we took out the old oven was a big hole that wasn't terribly useful.  P built me a sturdy shelf and now I have a place to put my most often used cookbooks.  We also beefed up the sides enough to put up my magnetic knife block.  It was awesome to finally have some place to put things.  

I finally got a mirror up in the downstairs powder room:

And the light I made a few years ago up in the master bedroom:

I also finished a transom to go in the master bedroom.  I haven't gotten a decent pic installed yet.  Here it is in process, before I had painted the wood frame.


Wednesday, January 19, 2011

The Stairwell

P and I took the autumn off to raise a puppy.  Vivian joined our little household last August about two weeks before I went back to school. When I went back to school, life got really hectic and we pretty much stopped doing any major work on the house.  We did a few minor jobs and I'll post about that later on in the week.  But mostly, we were going to puppy class and trying to keep Ms. Vivian from destroying the house we had just put together.

Gratuitous puppy pictures:


But, it's a new year and we decided it was time to get cranked up again.  The first project on the agenda, the stairwell.  I'd been putting this job off for a while.  I was supposed to do it last summer, and then over winter break, and here it is January, so we thought we'd take advantage of the long weekend.  I was putting this off because I knew this was going to get ugly before it got pretty.  

Just to refresh your memory, the before.  Note the paneling and carpeting. 


And this is how it looked in October.  Hey, I had to take advantage of how scary this beast was.


Gross, huh?  

Part of me wanted to just slap some paint on this sucker and call it a day.  Easy, straightforward, simple. No brainer.  But this is a NICE stairwell, or it could be something really pretty, under all that ugly. Paint wasn't going to make it really pretty, paint was going to be like putting a crapload of foundation on a zit.  You know, when it gets all caked up and cracked.  Nice mental image, eh?  No, in order for this stairwell to be pretty again, I was going to have to strip off a good bit of the ugly and that much ugly meant a big job.  I wasn't fully convinced yet that the foundation trick wouldn't work, so I got started.


I started with something easy, puttying the holes in the risers.  I knew that they would then need some sanding once the putty dried.


I decided to try sanding the handrail a bit to smooth it out.  The putty paint started to come off very easily.  I sanded some more and more paint came off easily.  Hey, maybe this wouldn't be such a horrible job.  Never count your chickens...   So, I sanded and sanded and sanded and after a few hours, most of the putty paint was off the top of the handrail, that was the easy part, slightly rounded, but level and smooth.  The sides are curvy and end in a cove-type shape and that wasn't so easy.  The paint wasn't coming off easily and the sanding wasn't going so well.  I finally called it quits after several hours.

I started up the next morning by pulling out the big guns.  A while back I bought a big tub of Peel-Away paint stripper.  I'd read that this stuff was the best.  The idea is that you apply the stripping material, smoosh some special paper over it, let it sit for hours, and then peel off the paint.  Easy peasy, right?  The label claims you can remove up to 30 layers of paint with one application.   I thought that I would be able to use it on the sides and those really difficult places.


This stuff has the consistency of warm cake icing.  And in many ways, it works quite well.  A couple of things to remember, don't let it dry, and cover it all with the special paper.  

Our stairwell has fat spindles on the corners and skinny spindles in between.  I knew that originally, the fat spindles and handrail were stained and the skinny spindles painted, so I decided to go ahead and strip the fat spindles. I slathered them with the cake icing stuff, and stuck the paper too them.  

Then I started to just peel away the first strips I put on.  Mostly, it came off well.  The curvyness of the sides of the handrail are still a bit problematic, but a little bit of sanding will take what remains off.  It does leave this gooey dark oily mess.  Not sure how that's going to come off.

Where the icing dried is going to need some work. I have to scrub it off with warm water, but I ran out of weekend.  I did some more work on it Tuesday, a snow day.  I still need to scrub it, sand it in some places, and then neutralize it.